Your first pipeline
Let's get started and create your first pipeline.
1. Repository Activation
To activate your repository in Woodpecker navigate to the repository list and New repository. You will see a list of repositories from your forge (GitHub, Gitlab, ...) which can be activated with a simple click.
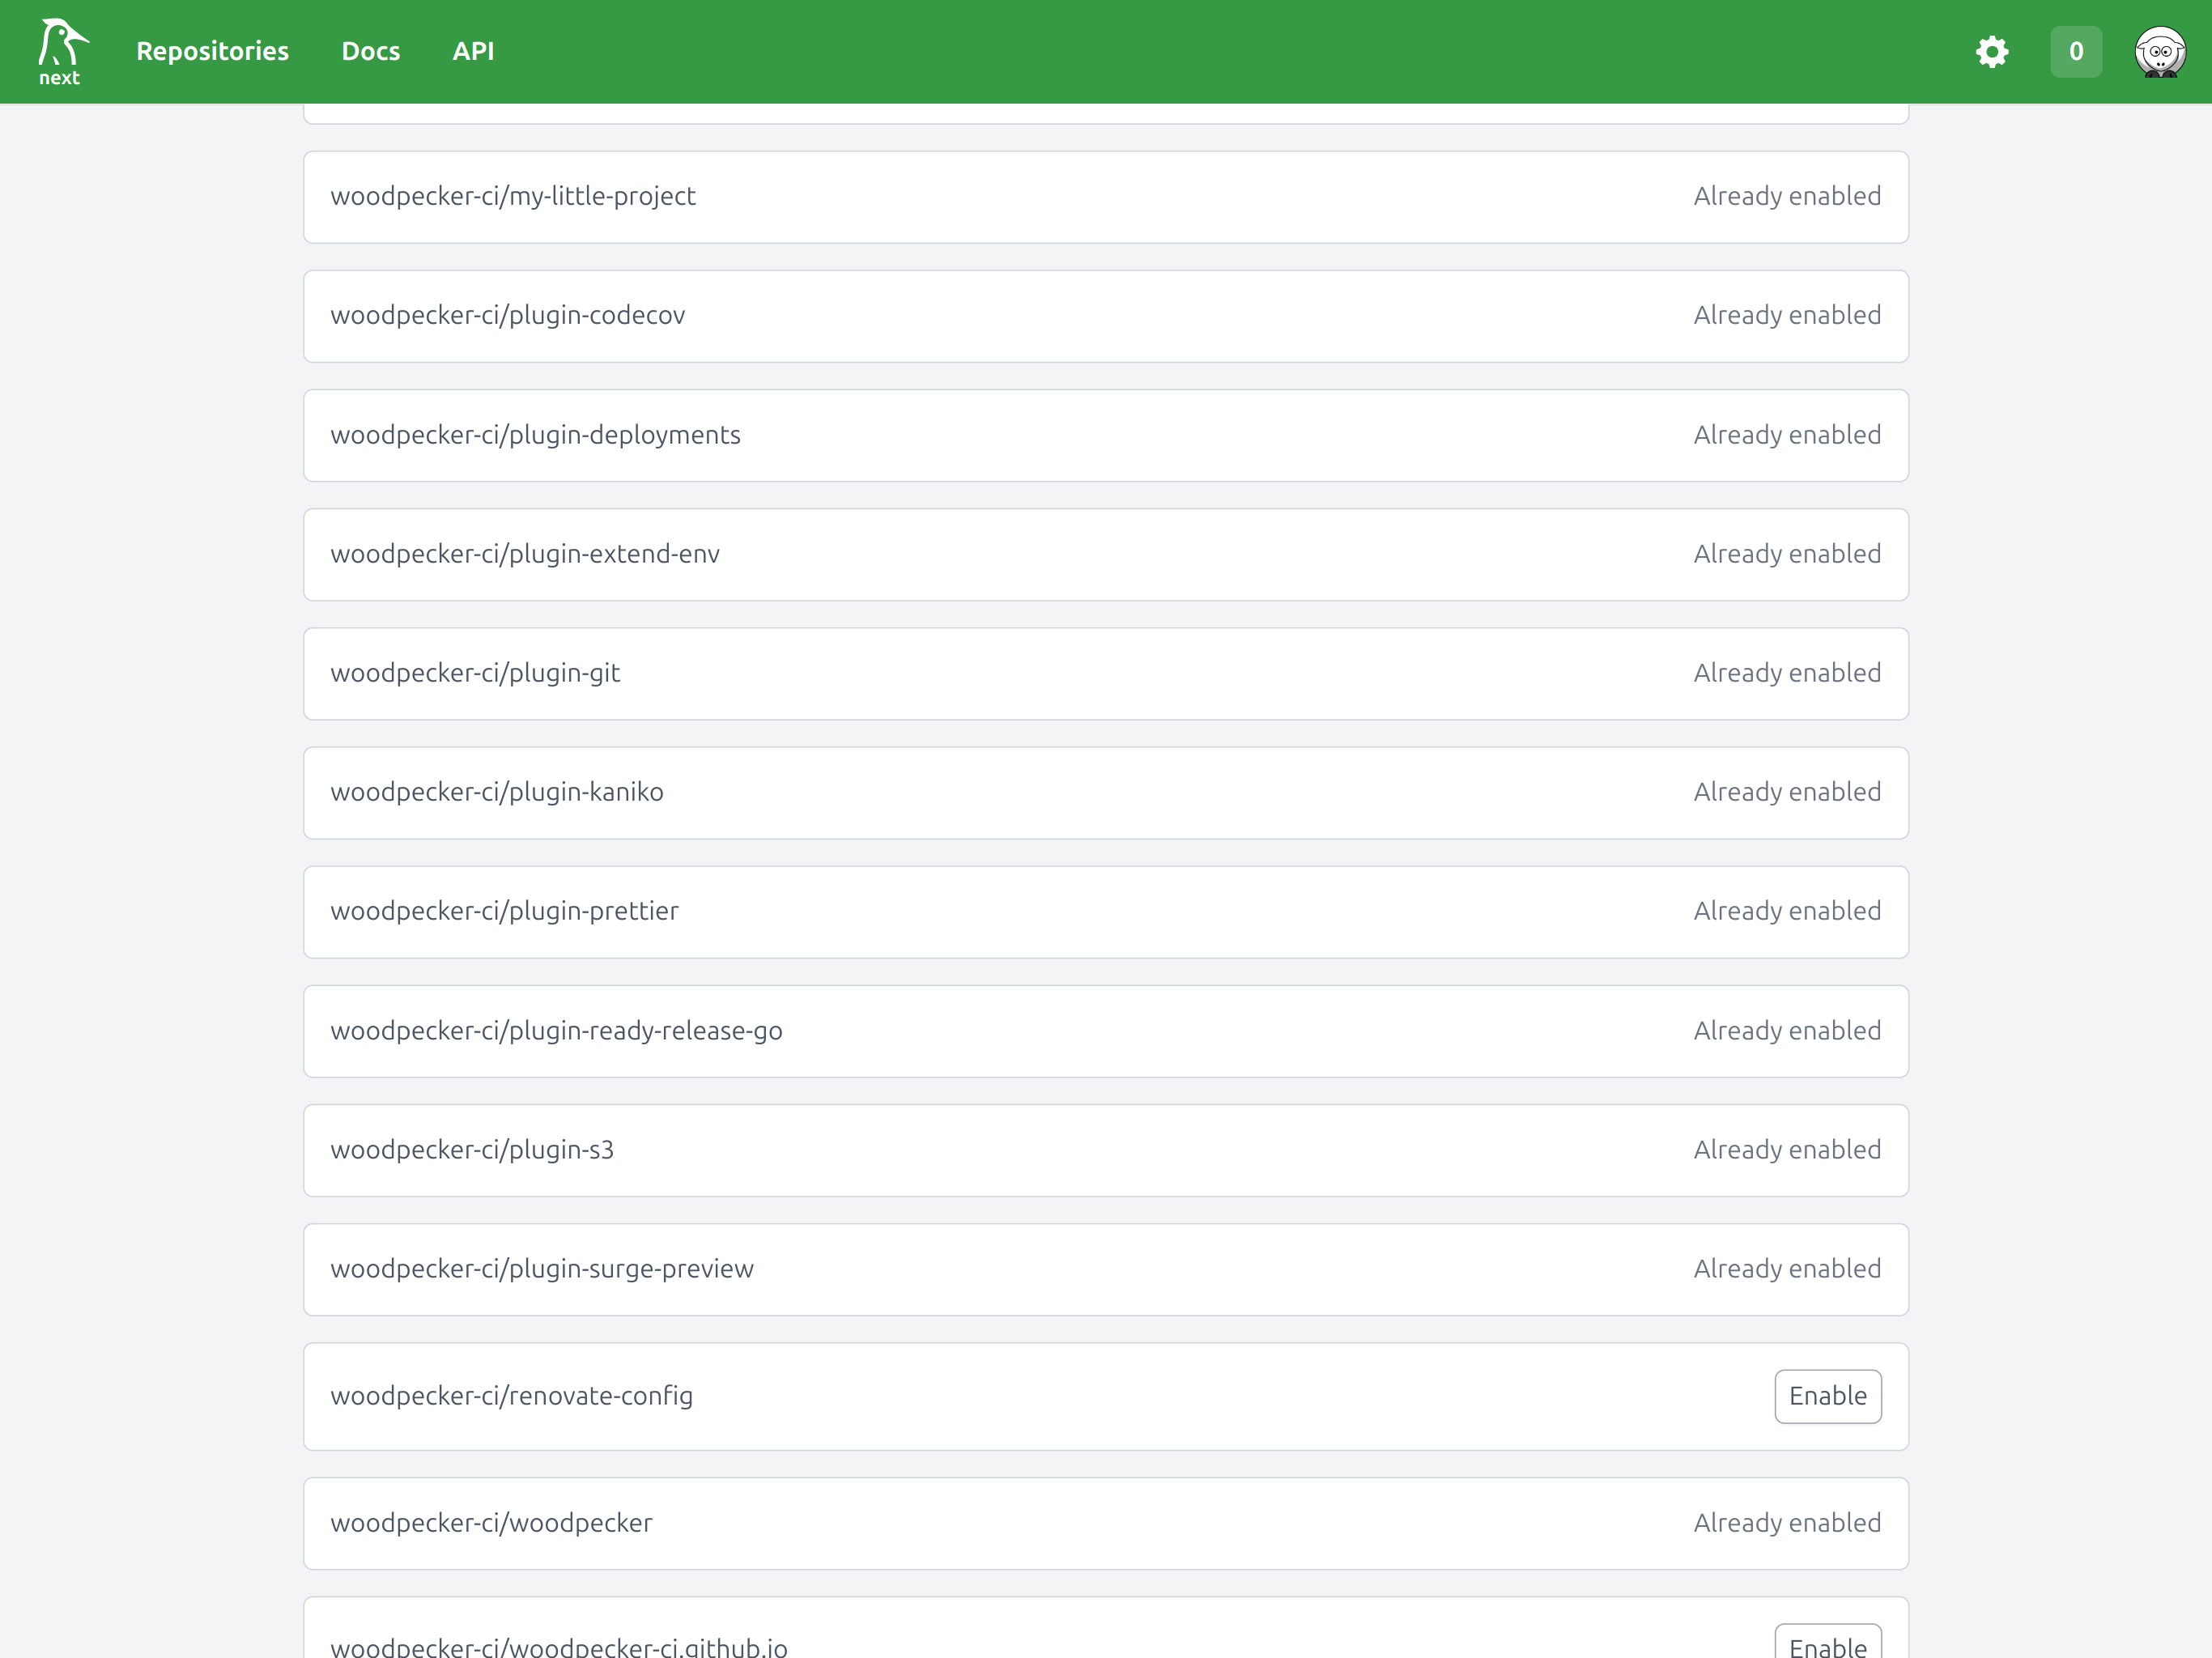
To enable a repository in Woodpecker you must have Admin rights on that repository, so that Woodpecker can add something
that is called a webhook (Woodpecker needs it to know about actions like pushes, pull requests, tags, etc.).
2. Define first workflow
After enabling a repository Woodpecker will listen for changes in your repository. When a change is detected, Woodpecker will check for a pipeline configuration. So let's create a file at .woodpecker/my-first-workflow.yaml inside your repository:
when:
  - event: push
    branch: main

steps:
  - name: build
    image: debian
    commands:
      - echo "This is the build step"
      - echo "binary-data-123" > executable
  - name: a-test-step
    image: golang:1.16
    commands:
      - echo "Testing ..."
      - ./executable
So what did we do here?
-
We defined your first workflow file
my-first-workflow.yaml. -
This workflow will be executed when a push event happens on the
mainbranch, because we added a filter using thewhensection:+ when:+ - event: push+ branch: main... -
We defined two steps:
buildanda-test-step
The steps are executed in the order they are defined, so build will be executed first and then a-test-step.
In the build step we use the debian image and build a "binary file" called executable.
In the a-test-step we use the golang:1.16 image and run the executable file to test it.
You can use any image from registries like the Docker Hub you have access to:
 steps:
   - name: build
-    image: debian
+    image: my-company/image-with-aws_cli
     commands:
       - aws help
3. Run the workflow locally
If you have woodpecker-cli and a supported backend installed, you can run the workflow before pushing it:
woodpecker-cli exec .woodpecker/my-first-workflow.yaml
This is useful for checking workflow syntax, command output, and metadata conditions while you are still editing the file. For more examples, including secrets and downloaded metadata, see local pipeline execution.
4. Push the file and trigger first pipeline
If you push this file to your repository now, Woodpecker will already execute your first pipeline.
You can check the pipeline execution in the Woodpecker UI by navigating to the Pipelines section of your repository.
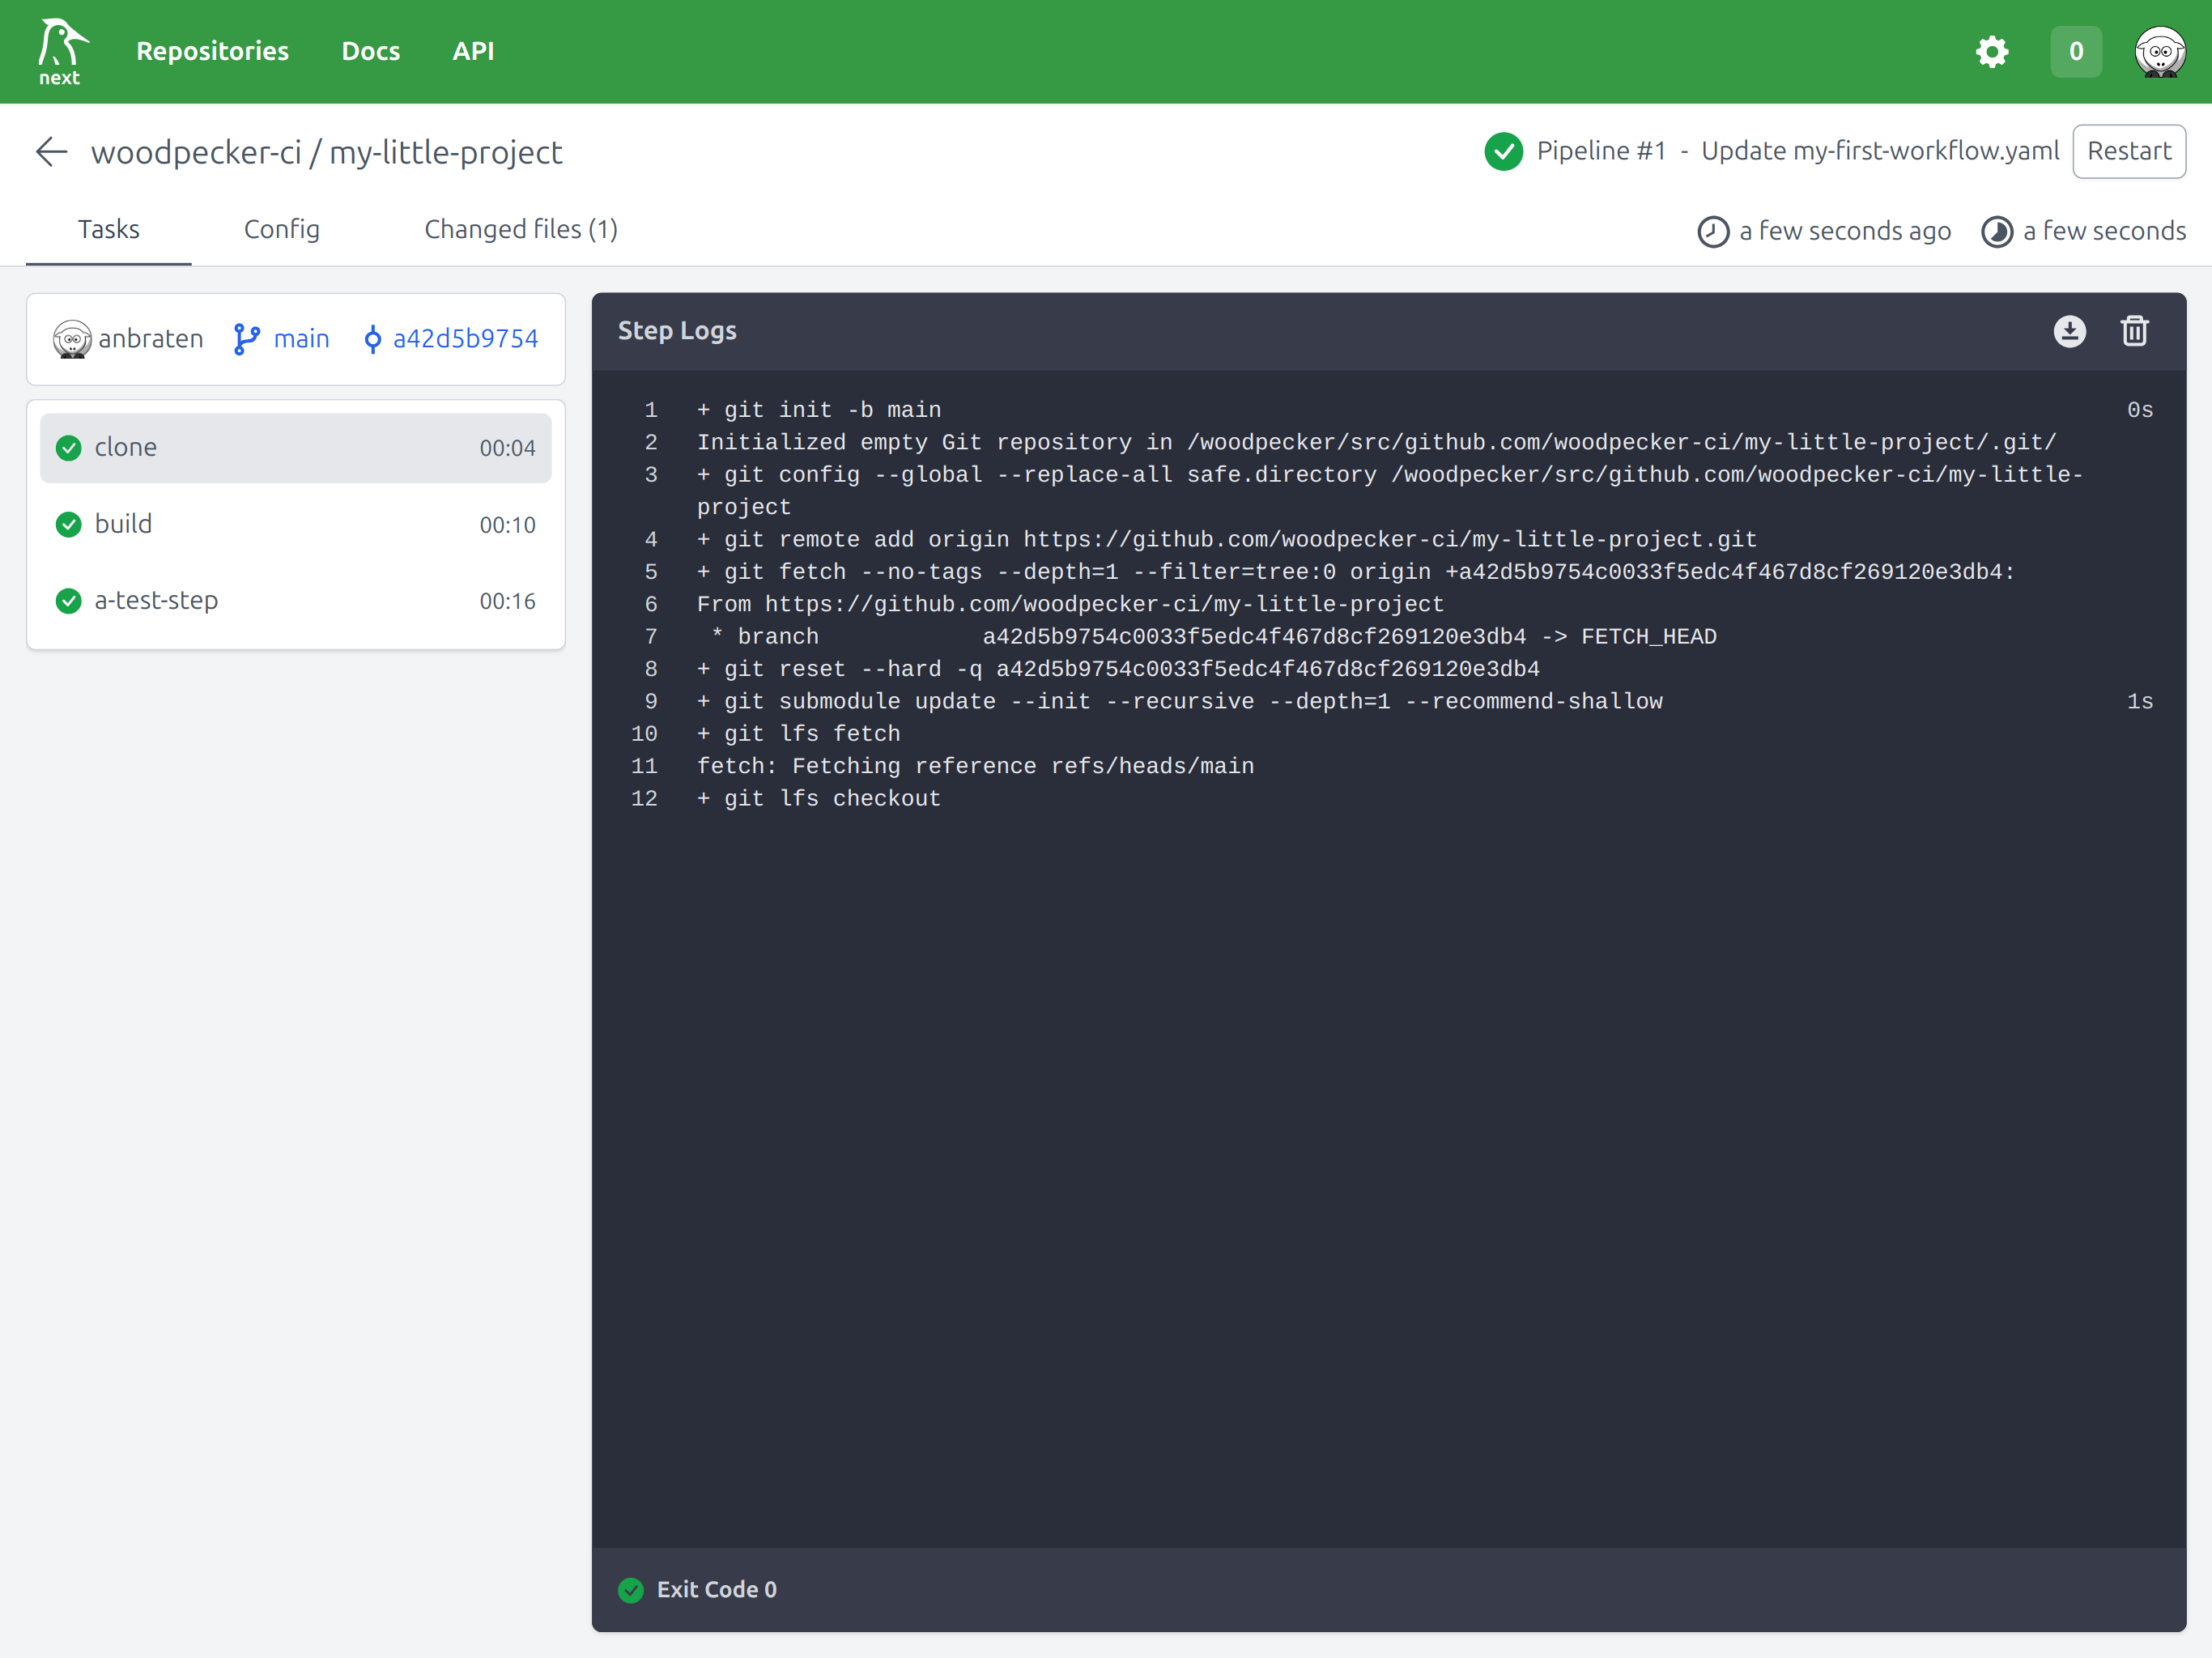
As you probably noticed, there is another step in called clone which is executed before your steps. This step clones your repository into a folder called workspace which is available throughout all steps.
This for example allows the first step to build your application using your source code and as the second step will receive the same workspace it can use the previously built binary and test it.
5. Use a plugin for reusable tasks
Sometimes you have some tasks that you need to do in every project. For example, deploying to Kubernetes or sending a Slack message. Therefore you can use one of the official and community plugins or simply create your own.
If you want to publish a file to an S3 bucket, you can add an S3 plugin to your pipeline:
steps:
  # ...
  - name: upload
    image: woodpeckerci/plugin-s3
    settings:
      bucket: my-bucket-name
      access_key: a50d28f4dd477bc184fbd10b376de753
      secret_key:
        from_secret: aws_secret_key
      source: public/**/*
      target: /target/location
To configure a plugin you can use the settings section.
Sometime you need to provide secrets to the plugin. You can do this by using the from_secret key. The secret must be defined in the Woodpecker UI. You can find more information about secrets here.
Similar to the when section at the top of the file which is for the complete workflow, you can use the when section for each step to define when a step should be executed.
Learn more about plugins.
As you now have a basic understanding of how to create a pipeline, you can dive deeper into the workflow syntax and plugins.